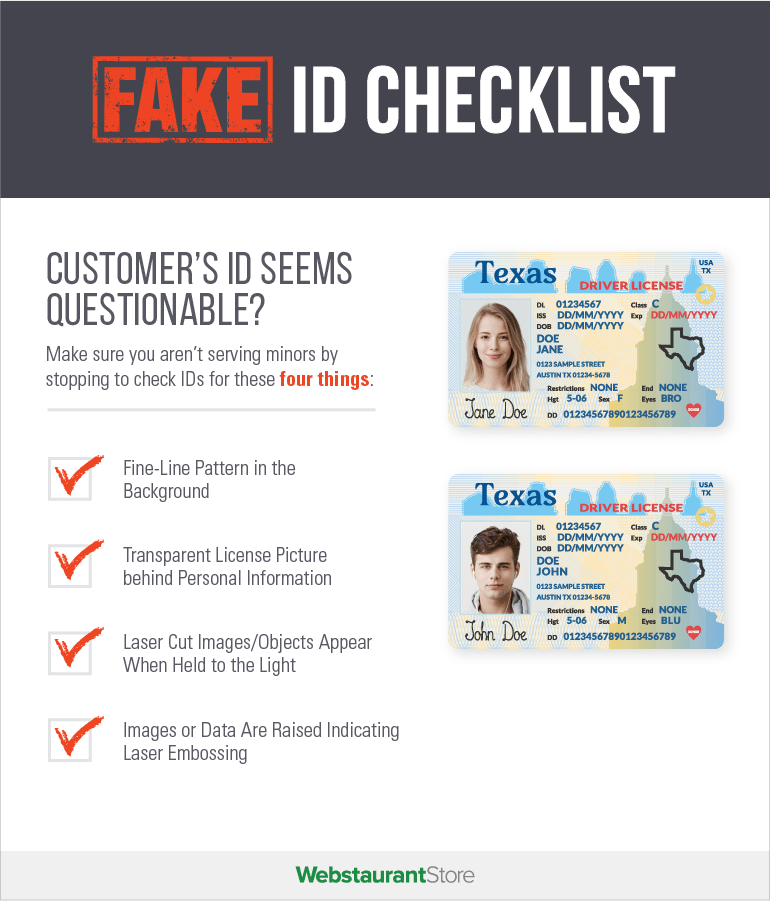
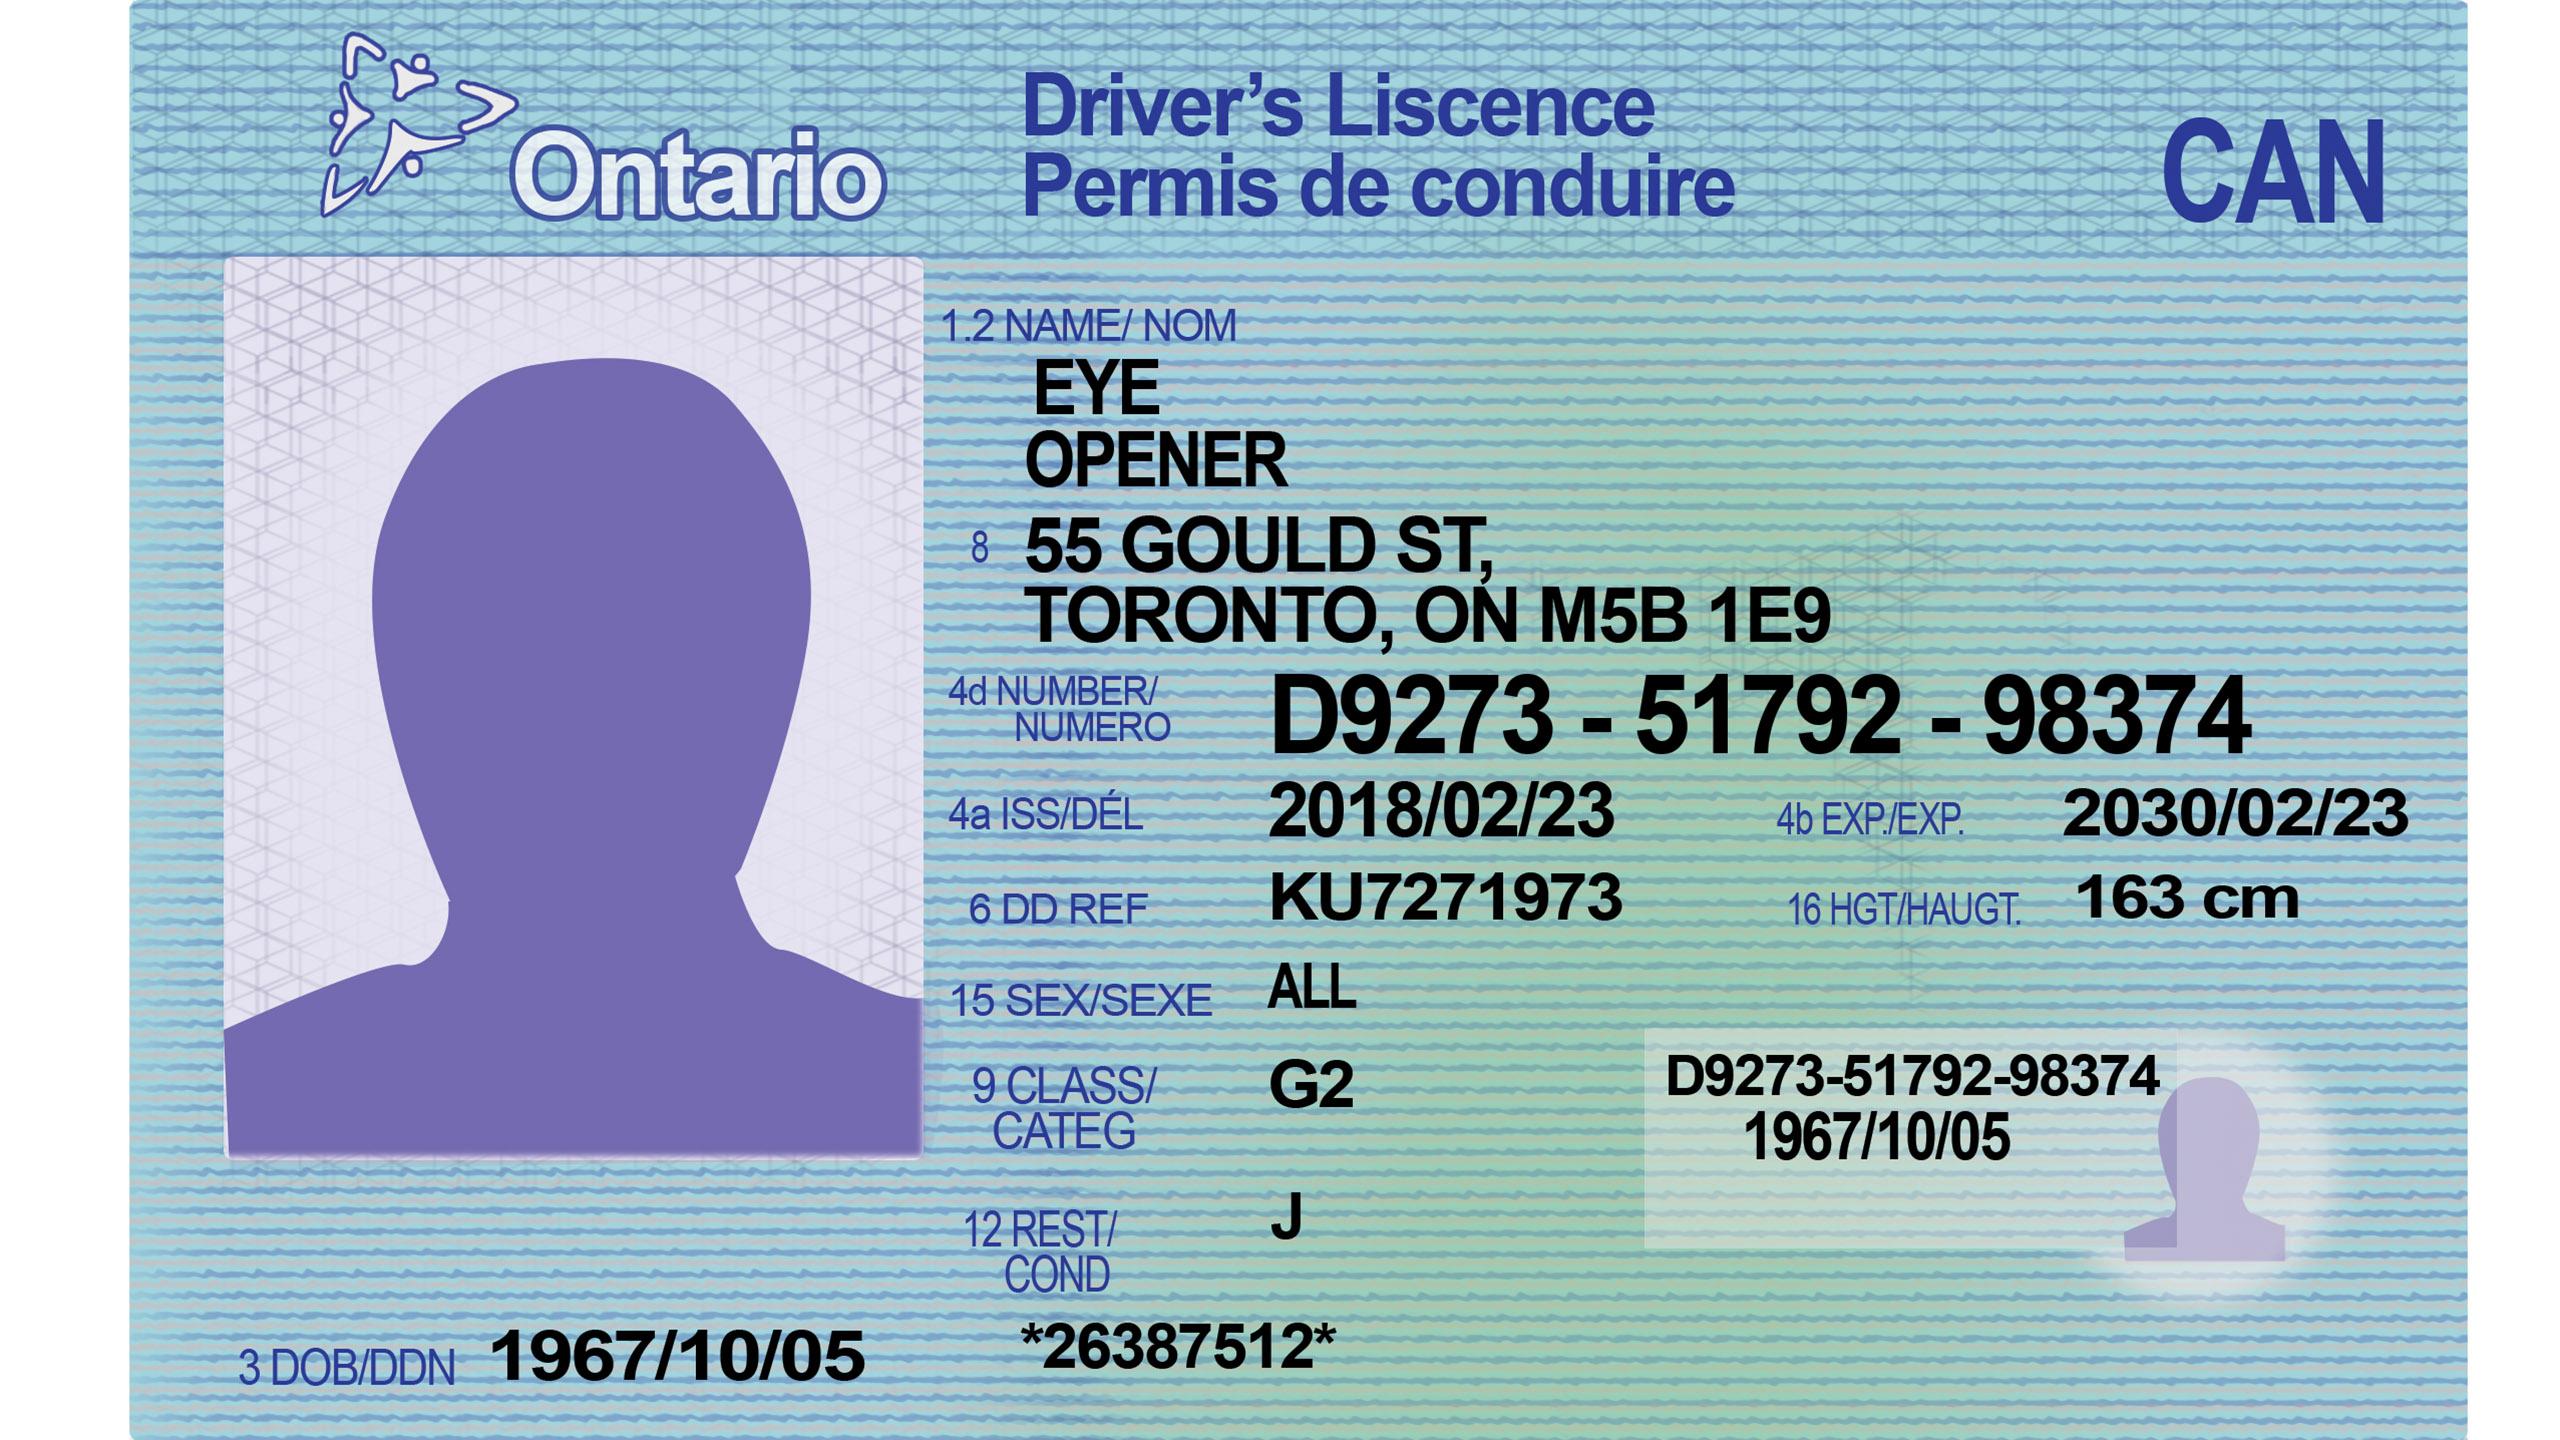
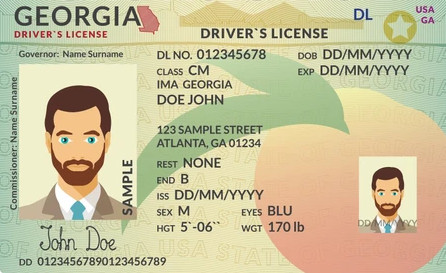
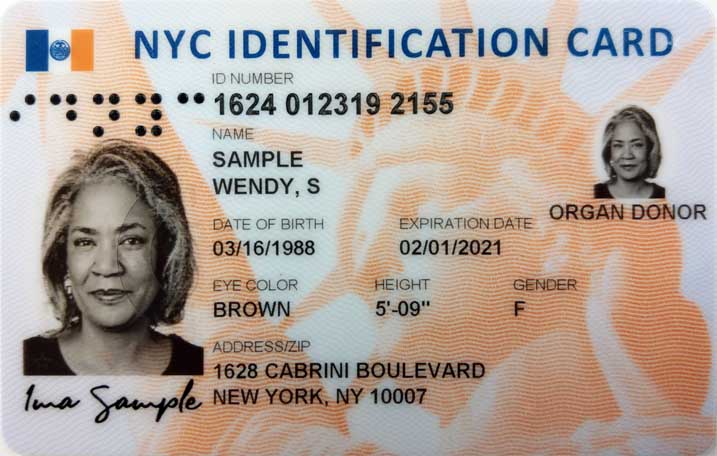
After creating your Google Wallet account, enter your personal identifying information like your name, address, and birthday.Then, add an id card to your account. To add an id card to your Google Wallet account, follow these simple steps: 1. On your iPhone or Android device, open the Google Wallet app. 2. Tap the Menu icon in the top left corner of the app. 3. Type “add id card” into the text field at the top of the screen. 4. Enter your personal identifying information into the id card text field. 5. Click the Add Card button. 6. Give your id card a name and click the Accept Card button. 7. Rename your id card if you want. 8. Click the Status bar at the top of the app to see the status of your id card. 9. Click the button next to your id card to view your card. 10. To manage your id card, click the “My Info” tab in the top left corner of the app. 11. Click the “Add Funds” button to add money to your Google Wallet account. 12. Click the “Save Funds” button to save your money to your Google Wallet account. 13. Click the “Sign Out” button to end your account. 14. To print out your id card, open the Google Wallet app and click the Print Card button. If you are not happy with the printer after you buy it, you can return it within a certain number of days. These come in many different designs and sizes, so finding one that fits your personality and needs is a breeze! The next most popular type of id card is the "Visitor" type. These have a photo of the visitor on the front and are typically just for online use. The cards are also popular because they are easy to format and capable of holding up to 256GB of storage. While some may choose to just discard their id card, or use it to purchase goods or services from certain businesses, others may find a use for their id card duplicate.